Automatic Deployment of jenkins-debian-glue
The automatic deployment method will provide you a full featured Continuous Integration system with Jenkins and jenkins-debian-glue within just a few minutes, assuming that you have neither of them installed nor configured.
The deployment script expects a Debian system (amd64 recommended), with >=1GB RAM and >=4GB of free disk space.
All you need to do to automatically deploy the stack is execute the following two commands:
wget https://raw.github.com/mika/jenkins-debian-glue/master/puppet/apply.sh
sudo bash ./apply.sh
This will take ~5 minutes (depending on network and disk speed).
After installation finished successfully, follow the instructions provided on the terminal.
NOTE: If any of the jenkins-debian-glue-source, jenkins-debian-glue-binaries or jenkins-debian-glue-piuparts Jenkins jobs are missing, or execution fails at an early stage, Jenkins might have rewritten those Jenkins jobs. Executing `sudo puppet apply ./jenkins_debian_glue.pp` should fix this.
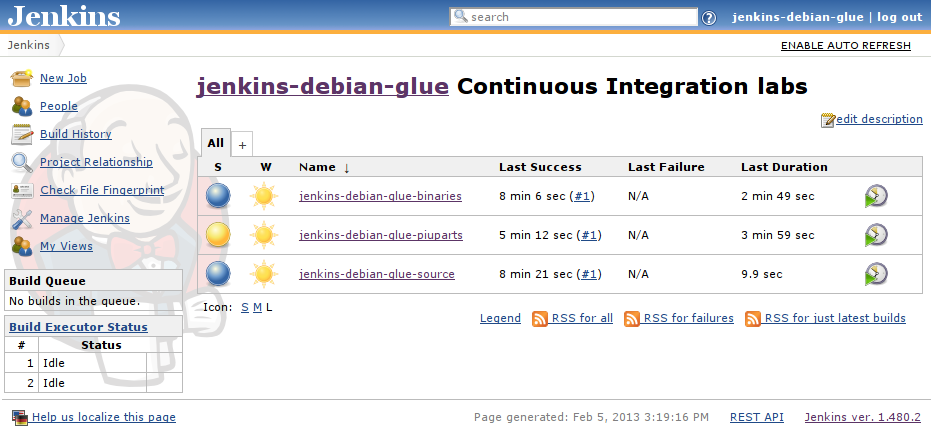
Go to the jenkins-debian-glue-source Jenkins job and select Build now. A few seconds later the job should be finished and automatically triggers the jenkins-debian-glue-binaries and jenkins-debian-glue-piuparts Jenkins jobs. This will take a while for its first run (setting up the cowbuilder environment for you).
Once the jenkins-debian-glue-binaries Jenkins job has finished as well you should have Jenkins jobs marked as green or blue (AKA success):
Problems? Check out the
build console log which should be available at
http://$SERVER_IP:8080/job/jenkins-debian-glue-binaries/architecture=amd64/lastBuild/console
Execute sudo repository_checker --list-repos jenkins-debian-glue to get a listing of Debian packages inside the
jenkins-debian-glue repository, which is available in /srv/repository. Now you have everything to add your own
Debian packages and enjoy the benefits of Continuous Integration.